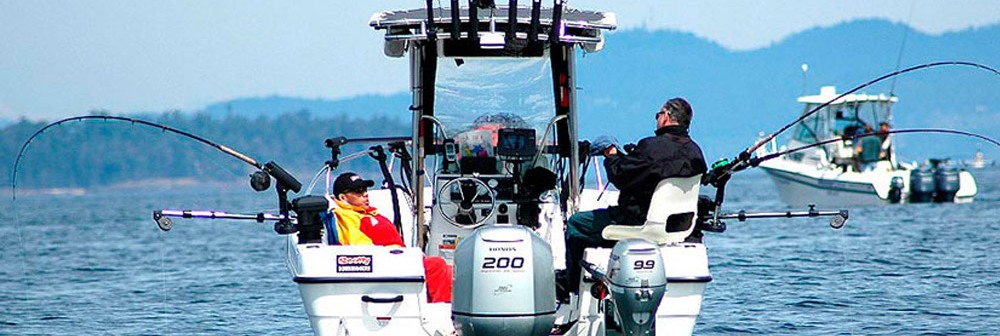
Setting up Your Downrigger: The First Steps to Fishing Success
A downrigger, though a simple tool at its core, can transform your fishing experience entirely. It allows you to place your lure at precise depths, an advantage not achievable by conventional fishing methods. This tool can make your line invisible to the fish by maintaining a certain distance from the boat, significantly increasing the chances of a bite.
Think about it. The deepest parts of the water often house the most elusive and sizable fishes, but traditional fishing gear limits your reach to the surface or near-surface depths. With a downrigger, you can effortlessly venture into the profound depths, making the unreachable, reachable.
Apart from the thrill of venturing deep, a downrigger is also efficient. It reduces the hassle of managing heavy sinkers and gives you better control over your line. And the best part? It works in various environments, be it freshwater lakes, saltwater coasts, or deep oceanic territories.
Are you an avid angler looking to up your fishing game? If so, using a downrigger might be just the technique you need to bring in bigger and more diverse catches. A downrigger is a device that helps you control the depth of your fishing line and lure, allowing you to target fish at different depths with greater precision.
Whether you’re fishing in deep waters or trying to catch a specific species, a downrigger can help you achieve your goals. But if you’ve never used one before, it can seem daunting. That’s why in this blog post, we’ll walk you through everything you need to know about how to use a downrigger, from setting it up to adjusting the depth and releasing your catch. So grab your fishing gear, and let’s dive in!
Setting A Downrigger To Your Fishing Rod
A downrigger is a device used in fishing that enables an angler to accurately control the depth at which their lure is being presented in the water column. The downrigger consists of a cable or wireline which is spooled onto a reel and attached to a weight, known as a cannonball. The weight is lowered into the water and the fishing line is attached to a release clip that is attached to the downrigger cable. The angler can then adjust the depth of the line by raising or lowering the cannonball.
To use a downrigger, the first step is to attach the downrigger to the boat in a suitable location, ensuring that the cable is running straight down from the downrigger to the cannonball. The next step is to select an appropriate lure or bait, taking into consideration the species of fish being targeted and the depth at which they are feeding. Once the lure is attached to the fishing line, it is then connected to the release clip on the downrigger cable.
The angler can then begin to deploy the downrigger, slowly lowering the cannonball into the water while paying out a line from the reel. Once the desired depth is reached, the angler can then lock the reel in place and begin trolling at a slow and steady speed, watching the rod tip for any signs of a strike. When a fish is hooked, the angler can use the downrigger to assist in landing the fish by retrieving the cannonball, which will help bring the fish closer to the boat. Overall, using a downrigger can be an effective and efficient way to target fish at specific depths, leading to more successful and satisfying fishing experiences.
Releasing Your Catch: A Step-by-Step Guide to Landing Your Fish with a Downrigger
If you haven’t tried using a downrigger yet, you’re missing out on some serious angling power. With a downrigger, you can precisely control the depth of your line, allowing you to target fish that would otherwise be out of reach.
But if you’re new to using a downrigger, the prospect of adding yet another piece of equipment to your already crowded tackle box might seem daunting. Fear not! In this full guide on how to use a downrigger, we’ll walk you through everything you need to know to get started, from setting up your gear to landing your catch like a pro. So whether you’re a seasoned angler or just starting out, read on to discover the secrets of downrigger fishing!
This article is for those anglers who are looking to buy or have already bought their first manual downrigger but still have difficulties with how to use it, with what lures, and so on. I understand how many questions and doubts this device can cause after a purchase: what baits can be used with a downrigger? How does it work at all? And in general, how does this thing help me catch more fish?
In this article, I will tell you in detail how to use downriggers, what they are for, how to choose a downrigger for yourself and use it effectively on the water. After reading this article, you can easily grab your boat, rod, and downrigger and go fishing without the slightest doubt!
Before We Start
Before we get started with the device and the installation of downriggers, let’s define what you need to have before heading out on the water.
Boat or some kind of vessel with a motor. Trolling fishing is by definition fishing from the boat, not from the shore. So if you were going to use the downrigger without a boat, I have bad news for you. You will need a motor for the fish to see your moving bait in the water and bait it. You can of course use paddles, but this is useless as you will never reach the same speed as a motorboat.
Trolling reel and fishing rod with tackle. The downrigger can only be paired with a trolling rod and reel. Without these two components, you will simply have nothing to fish for. By itself, the downrigger cannot pull the fish out of the water, it only serves as a “lift” for your bait. So before buying a downrigger, take care of purchasing a trolling rod and reel with baits, line, and everything you need.
Fish Finder. This doesn’t seem like the obvious thing you’ll need for trolling fishing, but it doesn’t make it any less necessary. You will need a fish finder to accurately locate the depth at which the fish is. Without a fish finder, you are unlikely to understand how deep you need to drop the weight and bait, and trying different depths at random is a very long and boring task. You need to know very well the body of water in which you fish with a downrigger and know exactly at what depth the fish you want to live in to fish without a fish finder.
Load clip or line release. To connect the downrigger and line from the rod, many anglers use a line release or clip. This device allows the downrigger to release the line when a fish bites your bait. Of course, there are other ways to tie the weight of the downrigger to the line, but this one is the simplest, cheapest, and most reliable.
Only after you have acquired all the points above can you say with confidence that you are ready to go out into the open water and use your downrigger and rod to the maximum.
How To Set Up And Use The Downrigger – Step By Step Guide

Controlling the depth and speed of the lure is key when trolling. If you are not using a downrigger, your lure will move upward, constantly moving away from the level at which the fish is. But if you fish with a downrigger, it keeps the bait at the level at which the fish move and stays in front of the bait all the time you move through the water. Now let’s see how it works.
Attach The Downrigger To The Boat
Before equipping the downrigger with weights and a fishing rod, you need to install it on your boat. Most of the downrigger models are already equipped with a mounting system as standard, oriented to place the device on a flat surface. They can be easily installed and removed.
But if you have a rubber boat or canoe, there may be problems with the anchorage. In this case, you will need additional mountings for your boat.
Mounting the downrigger on a plastic or aluminum boat (rigid body). On this type of vessel, the downrigger can be placed on any flat horizontal or vertical surface without additional holes. Apart from the standard downrigger set, you hardly need anything.
Installing a downrigger on a boat made of rubber or PVC. Here you can buy a mount and install the downrigger on the boat’s transom or bench.
Cannon Downriggers How To Install HD:
Choosing the Right Line and Lure: Tips for Maximizing Your Downrigger’s Potential
Choosing the right line and lure is essential for maximizing your downrigger’s potential and increasing your chances of a successful catch. Here are some tips for selecting the right line and lure:
- Consider the species you’re targeting: Different species of fish prefer different types of lures and bait. Research the target species and select a lure that is known to be effective for that species.
- Choose the right line: The type of line you use can also impact your success. Monofilament and fluorocarbon lines are popular choices for downriggers. Monofilament is more stretchy and forgiving, while fluorocarbon is less visible and more sensitive.
- Match the line weight to the weight of the cannonball: Make sure the line weight is appropriate for the weight of the cannonball you’re using. If the line weight is too light, it may not be able to handle the weight of the cannonball and lure.
- Experiment with different colors and sizes: Fish are attracted to certain colors and sizes of lures, so it’s a good idea to experiment with different options to see what works best. If you’re not having any luck with a particular lure, try switching to a different color or size.
- Use attractants: Attractants such as scents or flashers can help increase your chances of a successful catch. Apply attractant to your lure or attach a flasher to your downrigger to help attract fish.
By selecting the right line and lure and experimenting with different options, you can maximize the potential of your downrigger and increase your chances of a successful catch. Remember to always match the line weight to the weight of the cannonball and adjust your lure selection based on the species you’re targeting.
Attach The Line To The Downrigger
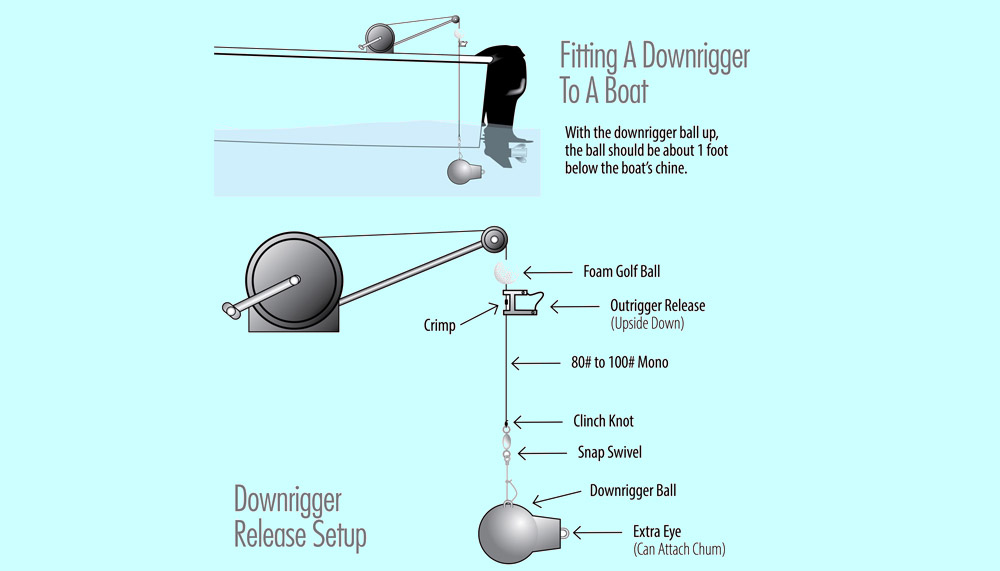
At the end of any downrigger boom (the longest part of a downrigger), there is a loop, ring, or carabiner that will allow you to attach the downrigger to the weight. In this step, you simply take this ring and attach it to the weight, no difficulties should arise with this.
Then you need a line release. Once you have attached the weight to the downrigger, you need to connect the line and weight with a line release. Now that everything is ready, you can install your rod into the holder.
Lower The Weight
The second step – use the fish finder to determine the depth at which the fish lives and lower the load along with the bait to this level. As the weight is lowered, the counter on the downrigger will indicate how many lines you have already lowered. This will allow you to accurately set the desired depth.
Start Trolling
While your boat is moving, the downrigger will keep the bait at the selected depth and make it move in the same layer of water as the fish. Some electronic downriggers allow the bait to move up and down. This is necessary to capture an even larger layer of water and attract more fish. Some electric downriggers can also keep the bait at a certain distance from the bottom. This is useful if you fish at depth.
Fight With Fish
Once the fish has spotted your bait and grabbed it, the latch on the line release opens and releases the line. At the same time, your fishing rod straightens, signaling that the fish is on the hook. Now you need to pull it out. Get the rod out of the holder and go for a duel with the fish!
This is how the downrigger allows you to professionally control the depth of the lure’s immersion and achieve excellent results when trolling.
What Is A Downrigger?
It is known that some species of fish (especially the largest ones) live at great depths most of the time. And getting to them, even if you use a wide variety of baits, is quite difficult, and often simply impossible.
Using a downrigger allows you to solve such problems by delivering the bait to the desired layer of water. The most popular when fishing with a downrigger is the depth range from 10 to 30 meters. If desired, a 100-meter depth can also be achieved. To do this, it is enough just to increase the weight of the load.
Downrigger Construction
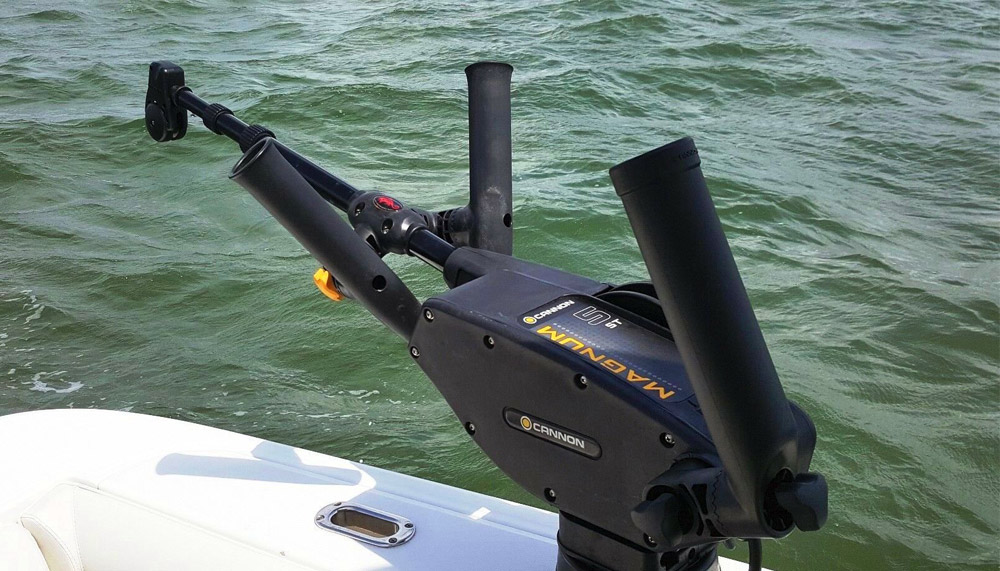
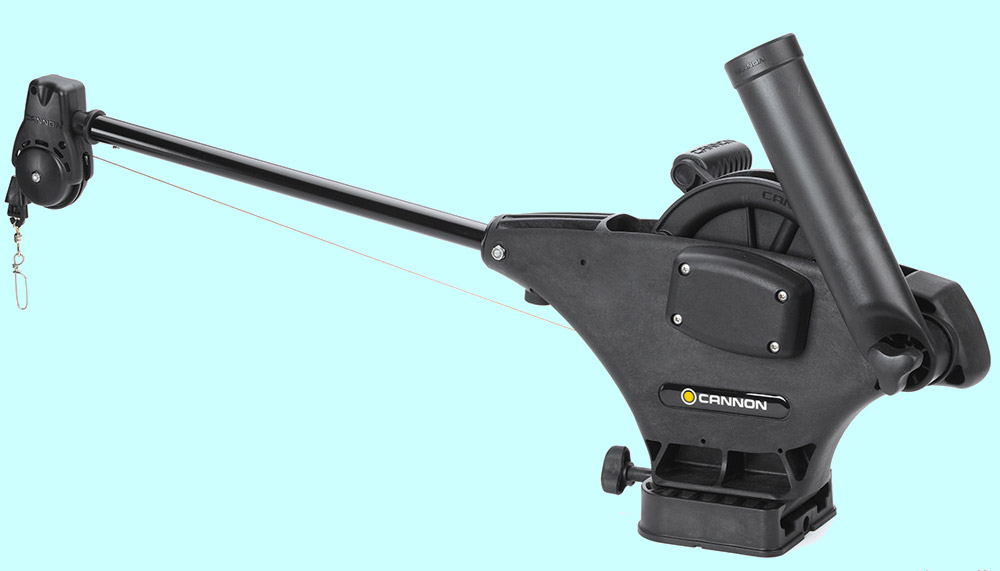
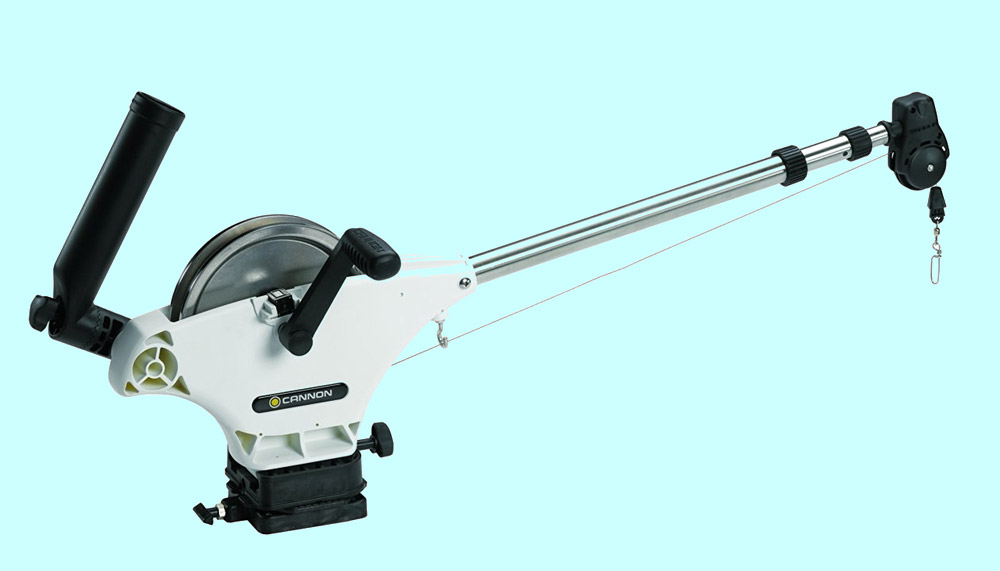
The device, in essence, resembles a simple winch with a small boom, with a pulley at the end. A downrigger is rigidly attached to the transom or side of the boat. Consists of the following main elements:
Volume reel with rope winding handle and stopper function. On more advanced models, there is a depth indicator in meters or feet.
The thickness of the downrigger cable depends on the degree of its load and the intensity of the current. For convenience, the cable can be labeled to indicate the amount of immersion.
At the working end of the cable, a weight is suspended, as a rule, in a teardrop shape. Its weight directly depends on the depth of fishing. Approximately, for every 10 m of diving, the weight of the downrigger weight is increased by 1 kg.
At 35 – 45 cm from the load, a very important piece of equipment is attached to the cable – a line release (clip), which connects the line and the downrigger.
The rod itself (usually a powerful spinning rod) is inserted into the holder on the top of the downrigger.
Thanks to the many models on the market, every angler can choose the most suitable downrigger for them. The differences are only in their sizes and materials. The most expensive models are equipped with an electric drive and a depth meter. Canadian manufacturers like Scotty Downrigger are rightfully considered the flagships in this industry.
How The Downrigger Works
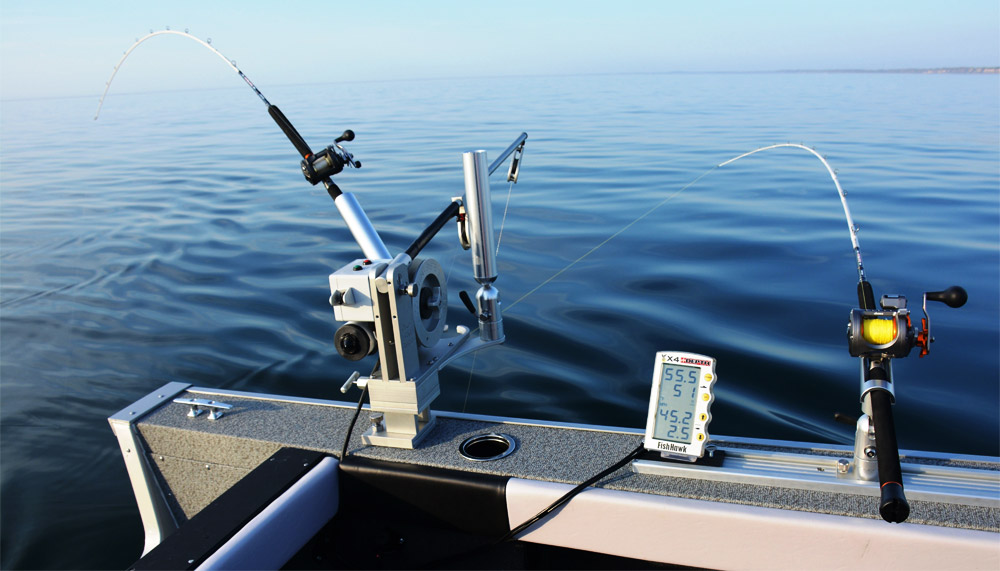
Despite some design differences and additional options, the principle of operation is the same for all downriggers.
The cable from the downrigger reel runs along with the boom and hangs out over the water through the pulley. The boat is moving at a low speed.
A load of the required weight is tied to the cable and a line release is attached.
A fishing rod with a reel is inserted into the holder.
The spinning line with bait is lowered into the water for a couple of meters (depending on the fishing conditions).
Then the line is fixed with a line release. The fixation should not be too strong, otherwise, the bite may simply not be noticed. The fish must free the line from the clip on its own.
Hold the reel with your hand and release its brake. It is important to adjust the rod reel brake to the minimum drag.
Once the desired depth is reached, apply the brakes on both the downrigger and fishing rod reels. Set the spinning rod to its working position so that its tip is bent into a small arc.
At the moment of the bite, the line snaps off from the line release, the rod is sharply straightened and an automatic fish hooking takes place. It is important for the angler not to miss this and to pick up the spinning rod to gently bring the fish to the surface and get it on board.
Then you need to lift the weight and reload the line into the line release. A downrigger is ready to go again. Of course, with an electronic downrigger, the weight management process is much more comfortable and quicker.
Adjusting the Depth: How to Find the Sweet Spot for Your Target Species
Adjusting the depth of your downrigger is a critical step in fishing for your target species. Different species of fish prefer different depths, so finding the sweet spot can greatly increase your chances of a successful catch. Here’s how to adjust the depth of your downrigger:
- Determine the target species: Before you start fishing, research the target species and find out what depth they typically swim at. This information can be found in fishing guides, online resources, or by asking local anglers.
- Use a fishfinder: A fishfinder is a valuable tool for locating fish and determining their depth. Use the fishfinder to locate schools of fish and adjust the downrigger accordingly.
- Experiment with different depths: If you’re not having any luck at a certain depth, try adjusting the depth up or down in increments of 5-10 feet until you find the sweet spot. Keep track of the depth where you get bites and adjust accordingly.
- Adjust for changing conditions: If the weather or water conditions change, you may need to adjust the depth of your downrigger. For example, if the water temperature rises, fish may swim deeper, so you may need to adjust your downrigger accordingly.
- Pay attention to the time of day: Some species of fish may be more active at certain times of day, so adjust your downrigger accordingly. For example, if you’re fishing for salmon, they may be more active at dawn or dusk, so adjust your downrigger accordingly.
By adjusting the depth of your downrigger and finding the sweet spot for your target species, you can greatly increase your chances of a successful catch. Remember to keep track of your adjustments and pay attention to changing conditions to ensure that you’re always fishing at the optimal depth.
💎How To Use A Downrigger – Video
I have prepared a video for you with the help of which you can see and understand how the downrigger works with your own eyes. Downriggers for beginners:
Benefits Of Using A Downrigger
Fishing with a downrigger offers several advantages, including:
- Reach deeper depths: With a downrigger, you can easily reach depths of 100 feet or more, which is difficult to achieve with traditional fishing methods. This allows you to target a wider range of fish species. The ability to work with absolutely any bait.
- Precision control: Downriggers allow for precise depth control, which can increase your chances of catching fish. By adjusting the depth of your lure, you can target specific species that are known to swim at certain depths.
- Cover more water: By trolling with a downrigger, you can cover a larger area of water than you would be able to with traditional fishing methods. This can increase your chances of finding fish and making a catch.
- Reduce fatigue: Fishing with a downrigger can be less physically demanding than other types of fishing, as you don’t have to constantly reel in and cast your line. This can reduce fatigue and allow you to fish for longer periods of time.
- Increase the number of lines in the water: With a downrigger, you can run multiple lines at different depths simultaneously, which can increase your chances of making a catch.
- Contact with fish is unlimited. The process of fishing is a matter of the fisherman’s technique.
- The ability to choose when buying the most suitable model for a specific boat, purpose, and wallet.
- The likelihood of catching rare species of deep-sea fish, as well as trophy fish, increases.
Downrigger Disadvantages
Of the shortcomings mentioned by fishermen, it is noted:
- A downrigger is a rather bulky and heavy device.
- High price.
- The need for self-selection and purchase of weight.
Some Fishing Tips When Using A Downrigger

Many experienced anglers use a variety of techniques and techniques when fishing with a downrigger. Below I have provided the most basic ones for you.
Thermocline. Modern fish finders help to detect this conditional boundary between warm and cold waters, called the thermocline. Its thickness rarely exceeds 1 m. For peaceful fish, this layer is very important. Large reserves of nutrients and undissolved oxygen are concentrated here. At its upper or lower boundaries, the fish prefers to feed. Consequently, this zone, with all its contents, attracts predators. Therefore, it is preferable to lower the bait precisely into this layer.
Boat speed. The speed of movement of the boat when trolling is also important. Experienced anglers lower various lures into the surface layer of water and, by changing the speed of the boat, reveal the mode of their brightest game. Then, already in “combat conditions”, observing this speed regime, they are guaranteed to get the best behavior of the bait and at depth.
Line release length. Novice fishermen often find it difficult to choose the distance from the line release to the bait. Here you need to adhere to the following theory: the shallower the depth, the longer the line release. The boat, passing over the very head of the predator, will certainly force him to retreat. But when he, seeing that the danger has passed, decides to return to position, a calmly floating wobbler can provoke him to attack.
Stuck bait. It is impossible to ignore such an unpleasant topic as holds. It is also difficult to part with hooked baits, but the presence of special cut-off devices, as well as the replacement of wobblers’ rings with braided ties, help to easily get out of an awkward position. Another thing is to hook the weight of the downrigger on the go. If the lost wobbler can be replaced with another bait, then it is quite difficult to carry a supply of multi-kilogram weights with you. As a result – a spoiled mood, the loss of a load with a considerable part of the cable, which will have to be cut off with his own hand. You need to be very careful in reservoirs with large differences in depths. It is better to study all its features in advance. And the best solution would be to have an experienced mentor nearby.
Some Tips for Novice Anglers
Familiarize yourself with the equipment: Before using a downrigger, make sure you are familiar with all the components and how they work together. This includes the cannonball weight, the release clip, and the downrigger cable.
Choose the right location: When using a downrigger, it’s important to choose a location where the fish are likely to be. This may involve researching the species you are targeting and identifying their preferred habitat.
Set the depth: Adjust the depth of your downrigger based on the species you are targeting and the depth at which they are known to swim. Use a fish finder to help you determine the depth of the water.
Use the right lure: Select a lure that is known to be effective for the species you are targeting. Consider using attractants such as scents or flashers to help attract fish.
Release the line: Once you have set the depth and attached your lure, release the line from the downrigger clip. Make sure to use a release clip that is appropriate for the weight of your lure.
Troll at the right speed: The speed at which you troll can impact your success. Research the species you are targeting and determine the appropriate trolling speed for that species.
Keep an eye on the downrigger: As you troll, keep an eye on the downrigger to make sure it is functioning properly and the lure is at the desired depth.
🔶Useful weblinks and websites:
- FishUSA: FishUSA is an online fishing tackle retailer that also provides fishing resources and information. They have a helpful guide on how to use a downrigger, including tips on setting the depth, choosing the right lure, and adjusting the speed. Visit their website at fishusa.com.
- The Fisherman: The Fisherman is a leading fishing magazine that covers a wide range of topics related to fishing. They have an informative article on how to use a downrigger, which includes step-by-step instructions and tips for beginners. Visit their website at thefisherman.com.
- Sport Fishing Magazine: Sport Fishing Magazine is a popular fishing publication that covers fishing techniques, gear reviews, and more. They have an article on how to use a downrigger that includes tips on choosing the right weight, lure, and line, as well as how to set the depth correctly. Visit their website at sportfishingmag.com.
- Outdoor Life: Outdoor Life is an outdoor recreation magazine that covers hunting, fishing, and other outdoor activities. They have a comprehensive guide on how to use a downrigger, which includes information on how to choose the right downrigger, set the depth, and troubleshoot common problems. Visit their website at outdoorlife.com.
- Trolling Power Solution: Trolling Power Solution is a website dedicated to providing information and resources on trolling for fish. They have an article on how to use a downrigger, which includes tips on choosing the right weight, setting the depth, and adjusting the speed. Visit their website at trollingpowersolution.com.
These websites offer authoritative information on how to use a downrigger, including tips, techniques, and troubleshooting advice. They are great resources for both novice and experienced anglers looking to improve their downrigger fishing skills.
Cleaning and Maintaining Your Downrigger: Keeping Your Gear in Top Shape for Years to Come
When it comes to fishing equipment, proper maintenance is essential to ensure that your gear stays in top condition and performs at its best. The same goes for your downrigger. Here are some tips for cleaning and maintaining your downrigger:
- Rinse with fresh water: After each use, rinse your downrigger thoroughly with freshwater to remove any salt or debris that may have accumulated on the cable, reel, and other parts. This will help prevent corrosion and extend the life of your equipment.
- Lubricate moving parts: Regularly lubricate any moving parts on your downrigger, such as the reel handle and drag system, with high-quality reel grease or oil. This will help keep the mechanisms working smoothly and prevent wear and tear.
- Check the cable for wear: Inspect the cable regularly for any signs of wear or damage, such as fraying or kinks. If you notice any issues, replace the cable as soon as possible to prevent it from breaking during use.
- Store properly: When not in use, store your downrigger in a dry and secure location to protect it from damage and corrosion. Use a cover or case to prevent dust and debris from accumulating on the reel and other parts.
- Follow manufacturer guidelines: Always follow the manufacturer’s guidelines for cleaning and maintaining your downrigger. Different models may have different maintenance requirements, so be sure to consult the manual for your specific downrigger.
By following these tips and taking proper care of your downrigger, you can ensure that it will perform at its best and last for many fishing trips to come.
Troubleshooting Your Downrigger: Common Problems and How to Fix Them
While downriggers are a valuable tool for anglers, they can sometimes experience issues or malfunctions. Here are some common problems that can occur with downriggers and how to troubleshoot them:
- Cable or reel jamming: If you’re having trouble pulling the cable up or down, or if the reel won’t turn smoothly, there may be a jam. Check the cable and reel for any knots or tangles, and use a lubricant to help loosen any stuck parts. If the issue persists, there may be damage to the cable or reel that needs to be repaired or replaced.
- Release clip not holding: If your release clip isn’t holding onto the fishing line, try adjusting the tension. If that doesn’t work, check the clip for any damage or wear and replace if necessary.
- Cannonball dragging on the bottom: If your cannonball is dragging on the bottom, you may need to adjust the depth or angle of the downrigger. If the water is too shallow for the weight of the cannonball, you may need to switch to a lighter weight.
- Cable snapping: If your cable snaps during use, it may be due to wear and tear or damage. Regularly inspect the cable for any signs of wear or damage and replace if necessary. Make sure to use a high-quality cable that is appropriate for the species and conditions you’re fishing in.
- Downrigger not staying in place: If your downrigger keeps moving or drifting, check the mounting system and make sure it’s securely attached. Adjust the tension or angle of the downrigger if necessary.
If you’re still experiencing issues with your downrigger after troubleshooting, it may be time to consult a professional for repair or replacement. Regular maintenance and care can help prevent many common problems, so be sure to follow the manufacturer’s guidelines and take good care of your downrigger.
FAQ: Perfect Your Technique with a Downrigger
Below you will find answers to the most frequently asked questions about downriggers.
In Conclusion: Unlocking the Mystery of Downriggers
In summary, a downrigger is a powerful tool for anglers looking to target fish at specific depths. By controlling the depth of the fishing line with a cannonball and cable, anglers can present their lure in the most effective way possible, leading to more successful fishing trips. Using a downrigger requires some knowledge and practice, but with the right techniques and gear, it can greatly enhance any angler’s fishing experience.
With the ability to accurately control the depth of your fishing line, you’ll have more opportunities to target a wider variety of species and bring in bigger catches. By following the tips and techniques outlined in this guide, you’ll be well on your way to mastering the art of downrigger fishing. So grab your gear, hit the water, and see for yourself how effective and enjoyable using a downrigger can be.
Many anglers associate the downrigger with a lot of fish on board. And in good hands, this device can bring you a good catch. The main thing is to know how to use it correctly and effectively. We hope our article taught you this and you are no longer afraid of downriggers and are ready to go out into the water and get any fish even from the bottom. Have a nice trolling!
Tags: #how to use a downrigger / #how do you set up a down rigger / #how to set a downrigger / #what is a downrigger used for / #how to use a downrigger setup / #how does a downrigger work / #all about downriggers / #how a downrigger can help you catch more fish

I live in Tenerife (Canary Islands) for the last 10+ years and share my daily fishing experiences on my website. Many years of personal experience as a fisherman and the vast experience of my friends allow me to write professionally on any fishing topics (from choosing a flashlight and equipment to deep-sea fishing).
All of my advice is based on practical real-world experience and will be useful to both novice anglers and professionals. Read more about the author.
Affiliate Disclosure: FishReeler.org sometimes gets paid for listings, through sponsors or affiliate programs like Amazon, Ebay, Cabelas, Bass Pro Shop, Shimano, Daiwa, Rapala, Renn, Okuma, KastKing, etс. Clicking a link helps keep FishReeler.org free, at no extra cost to you!
About the author: Each article is verified by the fishing expert Sergio Smirnoff. The articles are written by professional and amateur fishermen with 20+ years of fishing experience.
Note: The views and opinions expressed in this article are those of the authors and do not necessarily reflect the official policy or position of any agency. The articles are for informational purposes only, share your opinions in the comments and join the fishing discussions, let's share our fishing experiences together!

As an avid fisherman in the Northeastern USA, I can attest to the fact that how you use downriggers is entirely dependent on your location, the fish you are targeting, the time of year and day, water temperature, and a variety of other factors.
If you’re new to downriggers, my recommendation is to seek out some locals who are knowledgeable about the area and ask for some pointers. At the very least, try to determine how deep the fish are running, and you should be able to figure out the rest through trial and error.
Another useful tool to consider is a fish finder. You don’t need the top-of-the-line GPS/Sidescan/radar gizmo, but you do want something that is sensitive enough to detect bait and fish. Personally, I like a fish finder with GPS because it helps me track my speed, set waypoints, and see where I have trolled. A temperature gauge is also a big plus as you will be searching for warm water early in the season.
When using the fish finder, keep in mind that you’re not just looking for fish. In fact, the primary purpose of the fish finder is to locate schools of baitfish. You will see big “clouds” and “arches,” and these are your cues that the fish are likely hanging out somewhere between the surface and that bait. Once you start seeing bait, it’s a good idea to drop your downrigger weight down to that depth.
If you want to cover more of the water column with just one line, consider adding a sliding cheater to your setup. This involves taking a separate piece of line, adding a swivel on one end and a lure of your choosing on the other, and hooking the swivel to your main fishing line off the downrigger. This should sink to about halfway down the mainline as the mainline is “bowed.” However, be sure to check the legality of this technique in your area.
Of course, my experience with downriggers is specific to my region and the fish I’m targeting, which include Lake Trout, Landlocked Atlantic Salmon, Brown Trout, and Steelhead. Your results may vary depending on your location and target species. Ultimately, the key is to experiment and find what works best for you.👍
I just received an exciting call from my parents who were fishing in the lake. According to them, they spotted a big trout rise twice just off the shore. My dad estimated it to be close to 3 kg, which is about the same size as the fish recently caught that sparked this post.
He quickly changed his lure to a flying c and trolled over the area where the fish had surfaced. To our delight, he hooked it but unfortunately lost it after a few seconds of taking out line. Nevertheless, it feels like we’re getting closer to finally posting a picture of our catch instead of just text!
I’ve been using a SeaGhost 130 with a gear track to run the lake troller. The unit specifies a maximum weight of 4 lbs, but I’ve been using a 3lb ball without any issues. However, I think the length and material of the gear track might play a role in determining how much weight it can handle. My track is made of aluminum and is attached with four screws. I’m not an engineer, so I can’t say for sure, but I think having more screws might distribute the weight better.
I also wonder if the target fish species affects how well the downrigger performs. But ultimately, if all goes to plan, the fish should pop off the cable quickly, so I’m not too worried about that.
My biggest complaint with the downrigger is the noise it makes when vibrating in the water. I’m concerned it could be driving fish away and might be a reason why I haven’t had much success with it this season. However, this is my first time using it, and conditions have been weird, so it could be a combination of factors.
I tried using a Scotty lake troller downrigger for a bit, but I found it to be a pain to use and not well suited for a kayak. Instead, I’ve been using a setup with torpedo diver weights. There are different techniques for using them, and this video demonstrates one of them, although it’s not exactly what I’ve been doing.
I’ve found that there are many ways to troll deeper without using downriggers. Some of the alternatives include dipsy divers, snap weights, lead-core, and long-lining crankbaits. The question is how deep you need to go. Reef runners and other similar crankbaits can reach a depth of 30 feet without using weights.
Dipsy divers can go as deep as 100 feet depending on the size and setting. Lead-core lines can reach a depth of approximately 5 feet per 30 feet of line let out. Snap weights can vary in terms of size and shape. If you’re planning to do a lot of trolling, the Precision Trolling book and app are excellent resources to consult.➽
It’s great to hear about your success with the 10-pound downrigger line. It seems like you’re targeting a variety of fish species, and it’s interesting to know that you’re able to catch Kokanee, rainbows, and lake trout regularly with this setup.
I agree with you that the advantage of using downriggers is being able to fish with lighter tackle and still be able to effectively fight the fish. It can be a real thrill to catch a big fish in light gear, and it’s a great way to test your skills as an angler. Thanks for sharing your experience!
I also use the Lake Troller downrigger for my fishing trips. To keep my tackle light and have a better fight with the fish, I use a 3lbs ball, which works well for catching Kokanee, rainbows, and lake trout. However, I don’t think it can get you down to 80-100 feet. When trolling at 2 mph, the ball tends to drift back, so I follow it on my Garmin to hit the correct depth.
I have my downrigger mounted on the HRail of my Hobie PA14 kayak, but I believe you can go heavier on the ball if you mount it with support. However, I didn’t want to drill holes into my boat for a better mount.
I’ve tried using torpedo divers a few times, and I prefer them to the added drag of the ball and cable off the side of my kayak. I attach my clip to a loop knot on my line and set it up so the weight will slide down to a stopper before hitting the lure. I found a couple of videos of guys doing the same, and it’s been successful for me.
As an avid kayaker who recently added a downrigger to my gear for freshwater trolling, I’ve been considering taking it out on saltwater trips as well. However, I can’t help but worry about the potential safety hazards that come with using a downrigger in the open ocean.
During some of my past kayaking experiences in 10+ foot swells, I’ve had a recurring nightmare of the downrigger snagging on the bottom in a trough, only for the next big swell to come along and potentially flip my kayak. It’s a pretty dicey situation to be in.
One solution I’ve thought of is putting a weak link in below the normal downrigger line, such as a 40lb test, that would hopefully give way if I got hung up. I’d rather lose weight and some tackle than risk flipping my kayak on the north coast of California.
Have any of you had experience using a downrigger in saltwater conditions? How do you ensure safety while using it?
I recently discovered a helpful tip for using a downrigger on my kayak. Instead of using the traditional cable line, using a braided line can be a safer option. Just make sure to keep a knife or other tool tethered close by in case of emergency.
However, I read a comment about using a 40lb test line as a weak point, but it turns out that 40 lbs are not weak enough to break in an emergency situation. In fact, it may not even be strong enough to handle the weight of the fish you’re targeting. Personally, I’ve only been using a 4lb weight for trolling on my kayak, so I haven’t needed to worry about heavier line strength yet.
I am considering swapping out the cable that came with my downrigger for the braid, which has a higher test strength of 150 lbs. This should provide a safer and more reliable option for my downrigger setup.
I’ve found that using a 40lbs line for a downrigger won’t be strong enough for the torque of dragging a ball through deep water, especially with current. This may not be an issue when using a lighter weight, like a 4lb ball, but when trolling bigger water and with a current in salt water, you’ll need a heavier ball to maintain accuracy at specific depths where the fish are located.
To solve this problem, I recommend using a 150lb braid on your downrigger line instead of cable. Additionally, I always keep a knife on my life jacket for emergency situations like cutting the downrigger braid or if I ever get caught up in a crab line or something similar. I never use it for anything else so it stays sharp and ready to go.
I have to say, I’m a bit concerned when you mention 10-foot swells in a kayak. As a boater myself, I know that small craft advisories are issued for just 4-foot swells, and even in my 22-foot boat, I would never venture out in those conditions.
It seems incredibly unsafe, and I can’t imagine how you could even attempt to fish in those conditions, whether using a motor or not.
Have you perhaps mistaken swells for wind waves? Swell can generally be managed quite easily, especially if it’s slow.
Personally, I wouldn’t recommend using a downrigger in those conditions at all. It seems like an extreme example of risky behavior on the water.
Based on my experience, it is possible to be out on the water in 10-foot swells, but it’s not the safest thing to do. It really depends on the type of swell and if they are breaking or not. Slow rollers are manageable, but if they’re coming every few seconds, then things can get pretty sporty.
Looking back, I feel like I’m talking to my younger self. It’s just not worth risking your safety for a fishing trip. It’s not like Jacques Cousteau is lowering you down over the side of the Calypso into the ocean for research! So, my advice would be to stay safe and avoid extreme conditions like that.